Tuesday, May 19, 2009

Garlic, Chickpea and Spinach Soup

Hilary was in West Virginia over the weekend and had a long drive back in the rain. Clearly she needed some delicious soup upon her arrival back in town. As she was driving home, I started making the veggie stock for this soup. I started taking Mark Bittman's advice and freezing leftover bits of carrots, celery, onion, good stock veggies in the freezer and pulling them out when it is time to go ahead and make a stock. I also added some fresh items, including the stems from my recent beet purchase.


I ended up with tons of stock, enough for the 5 cups needed in this recipe plus 4 cups or so to put in the freezer.

This recipe comes from a cookbook (Vegetarian: the Best Ever Recipe Collection) I love but rarely use. I love it because it has photos with every recipe, both of the final product and of intermediate steps. Sometimes it's hard to envision what a recipe will turn out looking like, and its difficult to tell what will be appealing just based on ingredients and description. Looking through this cookbook, the photos make it all look especially appealing.

2 Tbsp olive oil
4 garlic cloves, crushed
1 onion, roughly chopped
2 tsp ground cumin
2 tsp ground coriander
5 cups vegetable stock
12 ounces potatoes, peeled and finely chopped (I used two medium baking potatoes)
15 ounce can chickpeas, drained
1 Tbsp cornstarch
2/3 cup heavy cream (I used half and half)
2 Tbsp tahini
7 oz spinach, shredded (I used baby spinach, whole leaves)
cayenne pepper
salt + pepper

Heat the oil in a large saucepan and cook the garlic and onion for 5 minutes, or until they are softened and golden brown. Stir in the cumin and coriander and cook for another minute.


Pour in the stock and add the chopped potatoes to the pan. Bring to a boil and simmer for 10 minutes. Add the chickpeas and simmer for 5 minutes more, or until the potatoes and chickpeas are just tender.


Blend together the cornstarch, cream, tahini, and plenty of seasoning. Stir into the soup with the spinach. Bring to a boil, stirring, for another 2 minutes. Season with cayenne pepper, salt, and pepper.

Serve immediately, sprinkled with a little cayenne pepper.


When I started making the soup, Hilary commented that it smelled just like chili. Yes! It does start out much like chili, with a similar group of spices. But it turns out nothing like chili at all. I tend not to make soups with much cream in them, perhaps because my signature "rainy day soup" uses shredded potatoes instead of dairy, so I always feel that is an acceptable substitute. But in this soup, the creaminess is perfect, offsetting the chili-esque spices and really making it a warming meal, good for a return home after a long rainy drive.

Sunday, May 17, 2009

Lettuce leaves and roasted beets

I find it soothing, perhaps nurturing, to wash and dry lettuce leaves. It's an intimate relationship with food: rinsing each bunch in the cold water; spinning it through the colander; setting every leaf out on the counter to dry.


And there's a similar sense of caring (though it is admittedly more tedious) when preparing roasted beets: scrubbing each beet, setting them collectively in the oven, holding each one to rub and peel off each bit of skin, finally getting to cut them open and the wonder of finding their hidden stripes.


Then, finally, putting it all together in salad form, sitting down to eat, enjoying simple and good food.

Saturday, May 16, 2009

Stonyfield Yogurt Strawberry Muffins

Given my overabundance of strawberries and my serendipitous discovery of a strawberry muffin recipe under the lid of my recently opened quart of Stonyfield yogurt, I bring you:

Melt in your mouth Strawberry Muffins
from Stonyfield Yogurt

1 cup all-purpose flour
1 cup whole wheat flour
1/2 cup sugar
1 1/2 tsp baking soda
2 eggs
1 cup Stonyfield Farm yogurt
1/4 cup butter, melted
1 tsp vanilla
1 cup chopped strawberries, fresh or frozen

Preheat over to 375F. In a bowl, mix together flour, sugar, and baking soda. In another bowl, mix eggs, yogurt, butter and vanilla. Toss strawberries into the flour mixture. Then pour yogurt mixture into flour mixture and stir. Spoon batter into greased muffin tin. Bake for 20-25 minutes or until tops are golden brown. Yields 12 muffins.


I meant to make only half a recipe, and successfully halved each of the ingredients... except the butter. Whoops. My mistake.

Obviously, these muffins are awesome, perhaps due to the high butter content. But I also like the mix of all-purpose and whole wheat flours; it gives the muffin a nice brown color and a feeling that you're getting something a little heartier than the usual cake-like muffin.

Saturday market 5/16

In today's purchases: the weekly cinnamon bun; a quart of strawberries (I can't resist) and a bag of salad mix from Eco Farm (I decided to try their strawberries today just to give it a whirl -- I had the feeling they might be a tiny bit better than the ones I'd bought the last few Saturdays, even though they're a dollar more -- these farmers are also very connected with their customers in a way I really appreciate); a few sprigs of peppermint and spearmint from Ayrshire Farm (I'm hoping to make some minty lemonade, or maybe some strawberry mint popsicles); and another batch of Chioggia beets, this time from Perrywinkle Farm as the ones from Elysian Farm were already sold out when I arrived at 8:30!

Friday, May 15, 2009

Immersion Blender & Strawberry Love

Last night, Spinning Ninny and I had a cooking adventure involving my chioggia beets from the farmer's market. I neglected to bring my camera to her house, so I'll let you read about our dinner debauchery at her post, but I did take a few photos of the cute and striped beets at my house when I roasted them.


As we consumed some berries for dessert, I explained to her how I can't help but buy a quart of strawberries every time I go to the market, and that I'm overloaded with berries. We started exploring some strawberry cooking options, quickly disregarding a great deal of them (I'm so over balsamic vinegar and strawberries, and Lord knows I'm not about to put strawberries alongside my pork or chicken) and finding maybe a winner or two for a future project (strawberry dumplings, anyone?).

But this morning, I've realized that all my worries about how to use these berries are gone, thanks to my immersion blender. As I have a few stray blackberries in the fridge along with the standard heaps of strawberries, I decided this morning was the right time to make a smoothie. I sliced up my berries, pulled out the yogurt, and walked towards the pantry to pull out the old stand-up blender, which inevitably would end up soaking in the sink for a few hours and then take up space in the dishwasher, all for one lonesome smoothie...

But wait! Now I have a magical immersion blender, which comes with its own blending beaker! (Yes, that is what the plastic jar/tub that comes with the blender is called. Amazing.) I can blend things, like smoothies, in a quiet and quick fashion, and be left with only the end of the little blender stick to rinse off and lay in the drying rack! No soaking! No washing! No loud annoying blending sounds to wake up my roommate and disturb the nearby birds!

Just a simple combo of a handful of blackberries, eight or nine strawberries, a scoop or two of yogurt, and a swizzle of honey. Best berry breakfast ever.


Also, in funny strawberry moments of the morning, I opened my new quart of Stonyfield yogurt to find a "melt-in-your-mouth strawberry muffin" recipe on the inside label. Clearly a project just calling out to be made.

Thursday, May 14, 2009

Things to Make

I'm constantly running across recipes I hope to someday make, keeping lists of new projects to try. Part of my inspiration in starting this blog was to use it as a way to catalogue the cooking projects I accomplish. I'd also like to be able to keep tabs on the projects I'm still waiting for the right moment to begin.

I've added a "Things to Make" list on the right side of the blog to keep better track of future potential projects. A few to start: making seitan (I've got the box of vital wheat gluten in my pantry, just gotta get to it); making yogurt (I need to get over my fear of leaving milk out of the fridge for longer than ten seconds at some point); baking biscuits (once I leave the South, how else will I satisfy my Sunrise cravings?).

Wednesday Market 5/13 and White Beans with Lacinato Kale

This week's market: strawberries from Rob at Whitted Bowers Farm, as always! Rob told me that the heavy rain this past week wiped out about a quarter of his melon crop -- 12 acres! Can you believe that? It's unreal, the amount of work that our farmers put out to bring us our food, and how it can all be washed away in a few days of heavy rain. Also, Chioggia beets (they're striped on the inside!) from Elysian Farm, and two baby heads of cabbage and three little heads of cauliflower from Eco Farm.


Onto last night's dinner, using the kale I purchased last Saturday. (I need to work on using my market items within a day or two of purchasing them -- the kale held up well, but it probably would have been especially delicious a few days ago right after being picked and sold.)

In addition to tasting great, Lacinato (or black or Tuscan or several other monikers) kale makes kale-lovers happy because it is so easy to clean. Unlike our friend the traditional curly kale, which has lots of tiny hooks and corners and places for dirt to hang on, Lacinato kale has a nice, long, flat leaf that makes it easy to wash off. Also simplifies the process of cutting out the stem!


Kale and white beans are often paired up in recipes (especially soup), and I had a cup or so of dried white beans stocked away in the pantry. I set them to soak yesterday morning in preparation for putting the two together for dinner. I found a recipe after searching online for just a few minutes. This recipe looked appealing mostly because I already had all the ingredients, but also because it requires cooking the white beans with a bunch of aromatics tied up in cheesecloth -- a cool idea that I've never tried. Even better, you cook the beans with several whole cloves of unpeeled garlic; then, when the kale is cooking, you add this cooked garlic to the saute pan. Hilary said, "it's like recycling!" So true.

Sauteed Tuscan Kale with Garlicky White Beans from Paula Wolfert

First, the beans:

1 cup dried white beans
4-5 cloves garlic, unpeeled

Aromatics tied in cheesecloth:
1 sprig thyme (I put in a sprinkle of dried thyme)
2 slices onion
1 carrot
1 small celery sprig
3 sprigs parsley (left this out)
1 bay leaf
12 peppercorns
1/2 tsp salt

Pick over the beans and discard any foreign matter. Soak in water to cover overnight. Drain; place in a deep pan or clay pot with the garlic, and cover with at least 3 inches of water. Bring to a boil, skim carefully, and add the bag of aromatics, pushing it into the beans. If you are sure the beans are fresh, add the salt now. Simmer, partially covered, for 30 minutes, then add the salt and continue cooking until the beans are tender. (The time needed will vary, depending on the age of the beans. You can tell when they are almost done by removing one or two beans with a spoon and blowing gently on them--the skin will burst). Simmer another 2 to 3 minutes, then remove from the heat. Allow beans to cool in the cooking liquid. Discard aromatics but not the garlic.


Then, the kale and beans:

12 small to medium leaves Tuscan kale (I used the whole bunch)
2 Tbs. olive oil
1 clove garlic, thinly sliced
1 1/2 cups cooked white beans
1/2 cup cooking liquor from the beans
3 cloves cooked garlic from the beans, peeled and halved
salt & pepper

Remove the center rib from each leaf and if the leaves are long, tear each into 4- or 5-inch lengths. Wash and pat dry. In a 10-inch straight-sided skillet heat the 2 tbs. olive oil, gradually add the leaves, and cook, stirring, until they wilt and sizzle in the hot oil, 2 minutes. Reduce the heat. Add the sliced garlic, cover, and cook the leaves until tender, about 10 minutes. Add the bean broth by the tablespoon, as needed, to keep the leaves from drying out.

Push the leaves to one side in the skillet; add the beans, salt, pepper, cooked garlic halves, and enough bean liquor to keep the dish juicy; cover, and simmer for 5 minutes. Serve warm with a drizzle of olive oil and freshly ground black pepper.


This definitely needed a hit of salt at the end to bring out the taste, and I wonder if some Parmesan would have really made it awesome. But a good recipe nonetheless, and as Hilary said, great in the "recycling" of ingredients (both the garlic and the bean liquor) from part one to part two.

Hilary and I had stopped by Trader Joe's after she got off work. Remembering that I now have a constant overflow of strawberries, I purchased a mango and a package of blackberries (not quite the season, I know, but they were a good price and smelled fragrant despite travelling all the way from Cali to get to us). We rocked a fruit salad after dinner.

Monday, May 11, 2009

Saag Paneer...with new immersion blender

Karen's parents gave me a red Kitchenaid immersion blender for graduation. Amazing! I hadn't asked for one, and didn't even exactly know that I wanted one, but now that I've used it, I'm pretty delighted to have it.

I purchased paneer from the Chapel Hill Creamery lesbian cheese farmers on Wednesday, and Karen requested saag paneer. A perfect chance to test out the new blender! Last time I made a paneer dish and wanted a smooth sauce, I scooped it all out of a hot pan and into the food processor -- a decent method, but the immersion blender makes blending up hot foods mid-cooking process a breeze.

First, frying up the paneer:


Saag Paneer


Ingredients

1 large onion
6 cloves garlic
1 oz fresh ginger
1 lb frozen spinach, thawed (we used a bit more, about 20 oz)
1 cup plain yogurt (we used sour cream)
4 oz buttermilk
2 teaspoon red chili powder
2 teaspoon garam masala
1 cup half and half (we used 2% milk)
6 oz paneer, a homemade cheese
1 salt to taste

Grind the onion, garlic, and ginger into a fine paste.

Look how beautifully the immersion blender made a paste of the onion, ginger, and garlic!

In a medium saucepan, combine the paste, spinach, yogurt, buttermilk, chili powder, and garam masala. Simmer at medium heat for 20 to 30 minutes. Mash the ingredients with a potato masher.


Using the blender (potato masher? pshaw!) to combine and smooth out all the ingredients.

Add the half and half. Simmer until the mixture has a creamy consistency, 10 to 15 minutes. Add the cheese, simmer 5 minutes. Season with salt. Makes 4 to 6 servings.


Paneer is always delicious. And the immersion blender made the sauce a great, smooth consistency. The recipe wasn't a spicy as I'd hoped -- I suppose I could have doused it with a splash of hot sauce or some cayenne -- perhaps this is the downside to using spice blends (like chili powder and garam masala) rather than making the blend from scratch. Nonetheless, a solid dish. Next time maybe I'll try Madhur Jaffrey's recipe in my Vegetarian Cooking from Around the World cookbook...

Graduation!

I graduated this weekend with my master's in social work. Very, very exciting. As graduation is a family and friend-filled event, but a very busy weekend in town and thus a difficult time to eat out, my roommate and I decided to host a post-graduation luncheon at our house.

On the menu:

Sweet Potato Salad with Honey Mustard Dressing


Israeli Couscous with Roasted Cherry Tomatoes, Asparagus, Green Pepper and Pine Nuts


Broccoli Slaw
(not this exact recipe, but very similar)


Fresh Strawberry Lemonade
(We may have spiked ours with Bombay Sapphire gin.)


Also: Mikki's family's famous meatballs! Karen's delightful deviled eggs! Mimosas! Challah from Boston! Fresh flowers from Hannah and Hilary's gardens! Family! Friends! Fun had by all!

Quick Hit: Crunchy Salad with Buttermilk Dressing

I'd been meaning to make this salad and dressing from Smitten Kitchen for a while. The dressing just looks so creamy and good, the salad so crunchy, and Deb is so emphatic about her love for this salad combo, I bought radishes at the market, and we had tons of extra celery around the house as Mikki and I had each bought a bunch at the same time, and I bought iceberg lettuce from the grocery store instead of cabbage -- I know, it lacks any nutritional value, but the crunchiness of that iceberg just drove me to do it! -- and off I went.

Napa Cabbage Salad with Buttermilk Dressing

1/2 cup well-shaken buttermilk
2 tablespoons mayonnaise
2 tablespoons cider vinegar
2 tablespoons minced shallot
1 tablespoon sugar
3 tablespoons finely chopped chives
1 pound Napa cabbage, cored and thinly sliced crosswise (4 cups)
6 radishes, diced
2 celery ribs, thinly sliced diagonally

Whisk together buttermilk, mayonnaise, vinegar, shallot, sugar, 1/2 teaspoon salt, and 1/4 teaspoon pepper in a large bowl until sugar has dissolved, then whisk in chives.

Toss cabbage, radishes, and celery with dressing.


Crunchy. Creamy. Totally awesome. The radishes give it a peppery zing, the dressing cools it right down, the iceberg lettuce and celery just crunch right up. Love it.

Strawberry Sour Cream Bread

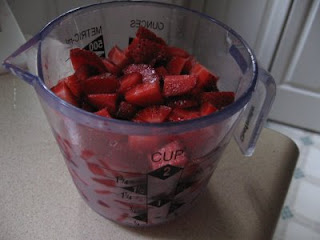
The strawberries at the market each week are so beautiful, I simply cannot stop myself from buying a pint each time I go to the market. Given that I head down the street to the farmer's market twice a week these days, I'm revelling in an overabundance of the berries and enjoying the challenge of what to do with them (aside from consume them all raw in a single sitting) each week.

This week's adventure? A baking project: strawberry sour cream bread. Yes.


Ingredients:
1/2 cup unsalted butter
3/4 cup granulated white sugar
3 large eggs
1 teaspoon vanilla extract
2 cups all-purpose flour
1/2 teaspoon baking powder
1/2 teaspoon baking soda
1/4 teaspoon salt
1 teaspoon ground cinnamon
1/2 cup sour cream
1/2 cup toasted pecans (coarsely chopped)
2 cups strawberries (fresh or frozen)


Directions:
1. Cream the butter and sugar in a bowl.
2. Beat in the eggs one at a time.
3. Beat in the vanilla.
4. Mix the flour, baking powder, baking soda, salt and cinnamon in another bowl.
5. Mix 1/3 of the dry ingredients into the wet.
6. Mix 1/2 of the sour cream into the wet ingredients.
7. Mix 1/3 of the dry ingredients into the wet.
8. Mix the remaining sour cream into the wet ingredients.
9. Mix the remaining dry ingredients into the wet.
10. Mix in the strawberries.


11. Pour the batter into a greased 9x5 inch loaf pan.
12. Bake in a preheated 350F oven until golden brown and a toothpick poked into the center comes out clean, about 60 minutes.


This bread came out moist and yummy. Definitely a good way to bake up some of my strawberry bundles.